An Introduction To SQL Server - SSMS
In this tutorial, I will assume you already have SQL Server Management Studio (SSMS) up and running and that it is already connected to your SQL Server. Check out Tuesday’s post here if you haven’t set those up yet. In this tutorial, we will go over SQL Server Management Studio basics. It would probably be good if you had a basic understanding of SQL but that isn’t required.
Creating A Database
In the Object Explorer on the left side of the window, you will notice a tree. The top item in the tree should say Databases, like this: 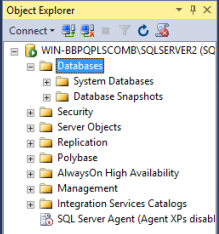 To create a new database, right click the word Databases from the Object Explorer and click New Database. A new window, which should look like the image below, will open:
 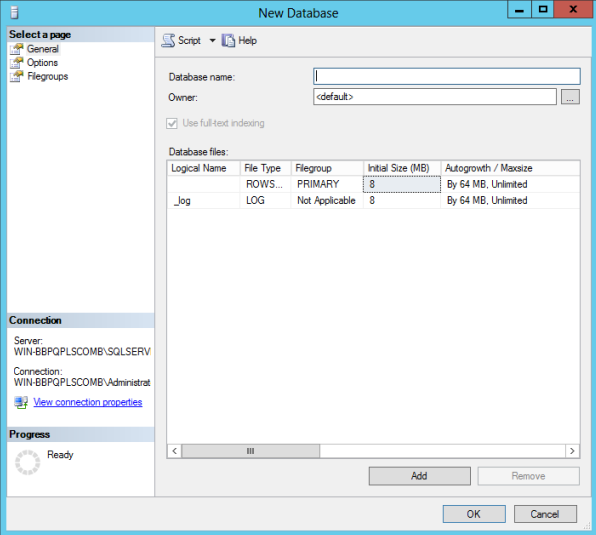 There are a lot of options we can set for our database with this window. The only thing we really have to provide is a database name (in the first text box). Other than that, we will keep everything else as their default values. We’ll explore some of these options in later posts. I’m going to recreate my Board Game Play Tracking database, since this is something I’ve already done a few times (once with Google Sheets and another time with SQLite). I’ll put my database name, BGPlays, in the Database Name prompt. You’ll notice as you type that SSMS automatically creates two database files, one with the name of your database (in my case, BGPlays) and one with your name_log (BGPlays_log). I’ll keep both of these as they are. On the left, you’ll notice three pages: General, Options, and Filegroups. As we have already seen, the General page deals with your database name but also for things like the initial size of the database and how SQL Server will manage its growth. We could also change where it is located, but we will leave all of this as is. The next two pages deal with more gritty details of the database, which we will learn about in future blog posts.
Adding Tables
We have our database, so now we need some tables. Doing this is very similar to creating a new database. Go to the Object Explorer and expand your database. You should see an option for Table. Right click that and choose New -> Table. 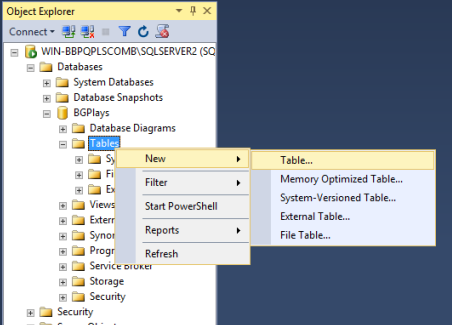 This will open up a couple of new windows, which are more or less broken up into three parts. They are shown below:
 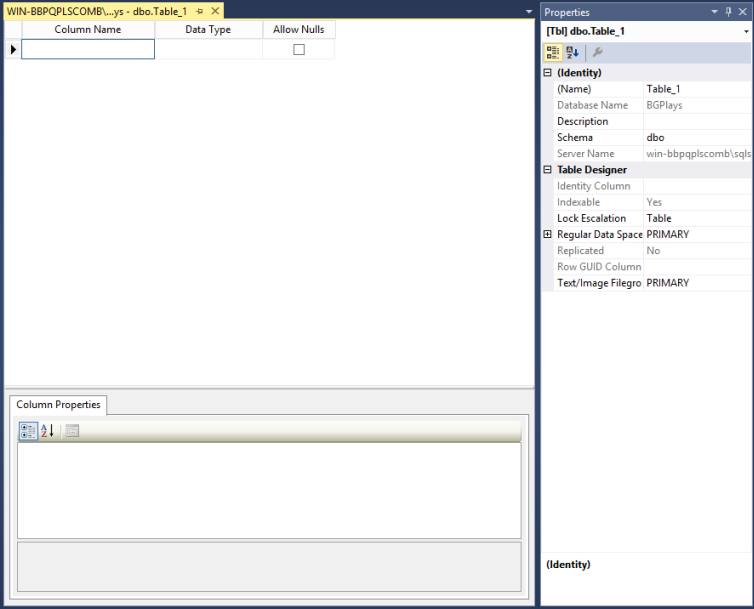 The main part is on the top left. Here, we can see and add the fields for this table. We have the options Column Name, Data Type (which can be things like INT, VARCHAR, timestamp, etc), and Allow Nulls. The first table I’m going to create will be my games table. This table will have the columns game_id (which will be the unique ID for the table), name (the game name), and bgg_id (the id for the game in boardgamegeek). All of these will be required except for bgg_id. My fields in the end look like this:
 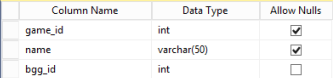 The next portion of the window is just below this, on the bottom left side, and is titled Column Properties. This section lets you set and change settings for specific columns. This is divided into two parts: general and Table Designer.
  General contains the same information as what we have already set; however, here is where you would set a Default Value if you needed. Some of these properties will depend on the Data Type that you have chosen. For this basic database, the only thing we care about is under Identity Specification. Click the on the column for your primary key and then click the arrow net to Identity Specification in the Column Properties panel. It will look like this:
  To let SQL Server know which column we want to be the primary key, we must change the (Is Identity) property to Yes. If we want this column to auto increment, keep the Identity Increment value at 1. The third and final section is on the right and is title Properties. This portion deals with the table and not the individual columns. For now, all we will do is give the table a name (for me, this is games) and tell it which column to use for our Primary Key.
 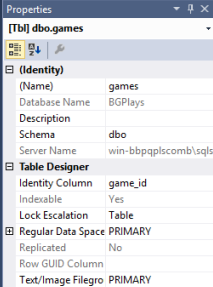 Before we save, we need to tell SSMS that we are okay to save changes that require a table to be re-created (otherwise, when we define the primary key column we will get an error). To do this, navigate to: Tools -> Options -> Designers -> Table and Database Designers. From here, clear the Prevent saving changes that require the table to be re-created. After this, save the table and database by pressing Ctrl+Shift+S or go to File -> Save All. I will repeat this process for the rest of my tables (locations, players, scores, plays, and playersplays). In order for our tables to show up in the Object Explorer, right click on the database name and click Refresh. If you want to get back to the view that we have when we create a new table, right click the table and choose Design.
Insert Data
To insert data, click the New Query button, which is near the top of SSMS and in the middle. It looks like this:  Alternatively, we can open the query window by pressing Ctrl+N. Within this window, we can type our SQL commands to manipulate the data. To insert data into our database, we use the following general formula:
INSERT INTO dbname (column1, column2) VALUES (value1, value2)
Alternatively, if we put the data in the same order that we defined the table in, we can simplify it as:
INSERT INTO dbname VALUES (value1, value2)
If you are familiar with other versions of SQL (such as SQLite or MySQL), there is one major difference. With other languages, we must specify our auto incrementing column and give it the value NULL. With SQL Server, we do not put anything for that column. For example, my games table has the columns game_id, name, and bggid. The game_id is the primary key column and it is auto incrementing. The command to insert a row into this table is different for SQLite/MySQL and SQL Server. SQL Server:
INSERT INTO games VALUES (‘Alhambra’, 6249)
SQLite/MySQL:
INSERT INTO games VALUES (NULL, ‘Alhambra’, 6249)
Once we type our command, we can run it by pressing F5 or by clicking the Execute button.
Visualize Data
SSMS allows us to view the last 200 rows of a table without using any SQL Commands. To do this, right click on the table and choose Edit Top 200 Rows. 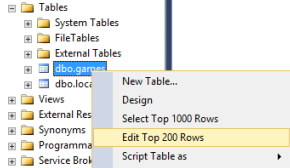 This will bring up a new window that looks like this:
  Alternatively, we can use the Query window to view our data. The command for this is just like it would be for SQLite or MySQL:
SELECT * FROM dbname
For me, this returns: 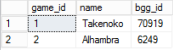 That’s it for building our first SQL Server database using SSMS. Have questions or suggestions? Please feel free to comment below or contact me.