Installing SQL Server on Windows Server 2016
I’m lucky enough to have a server at my house that my boyfriend got set up with Windows Server 2016 so that I can learn how to navigate Windows Server and SQL Server. For this tutorial, I will assume you have a Windows Server 2016 machine up and running and the ability to remote into it. I will be using my Chromebook to remote into the server; both machines are set up with VNC Viewer.
1 Download the ISO file
The first step for us is to download the ISO file for SQL Server. Microsoft generously gives us a 180 day evaluation window for trying out SQL Server for free (here). The most recent version available for me is is the SQL Server Release Candidate 2. On the Windows Server machine, open Internet Explorer. If it is not on the desktop, press the windows key to open the start menu, then click on Internet Explorer. 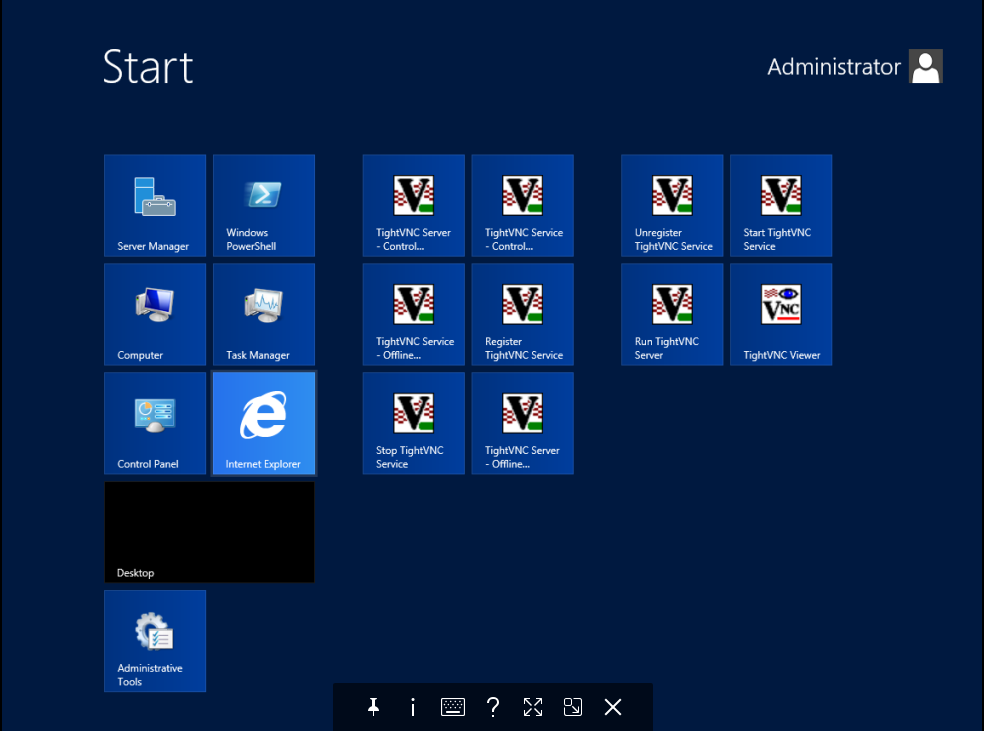 This version of Internet Explorer will function just like the IE you are probably used to. Next, navigate to the webpage with the ISO (here). Expand the Download bar then click the link to sign in with your Microsoft account.
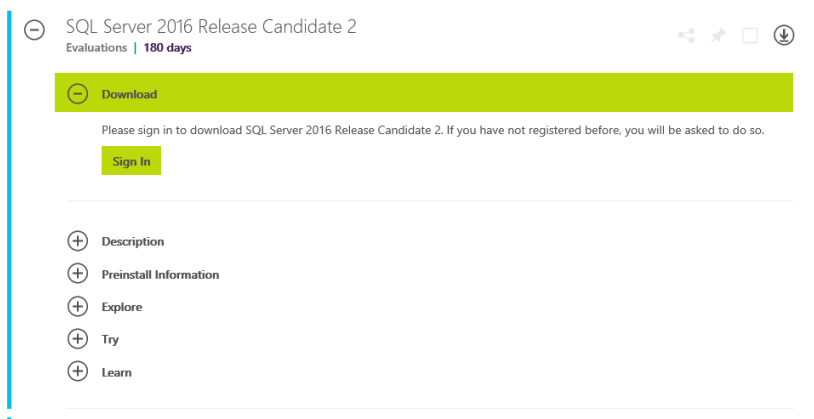 After you sign in, go ahead and choose the file type you would like to download. I will choose ISO then click Register to continue.
 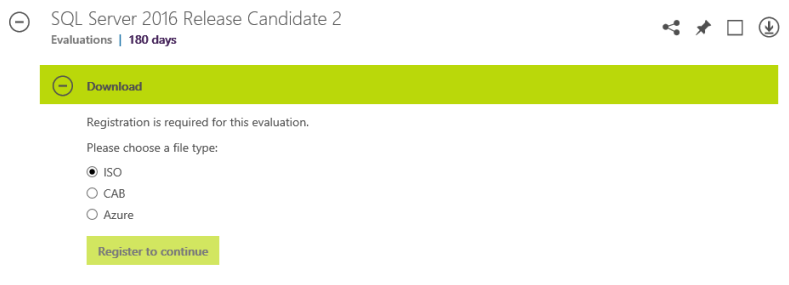 In order to register, you will need to fill out a quick form with your name, email address, language, etc then press Continue. Once the page loads, click the Download link. Choose Save instead of Open. Note that it may take several minutes for the download to complete.
2 Mount the ISO
Mounting an ISO file in Windows Server is really easy. Navigate to the ISO file that we downloaded (for me, that is C:\Users\Administrator\Downloads), right click the ISO file and choose Mount. 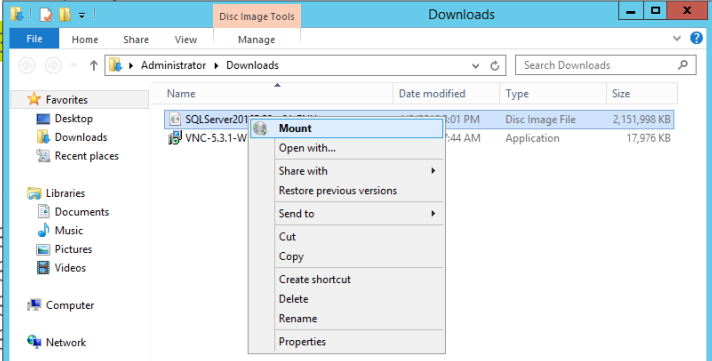 This will change the file explorer to a location that looks like this:
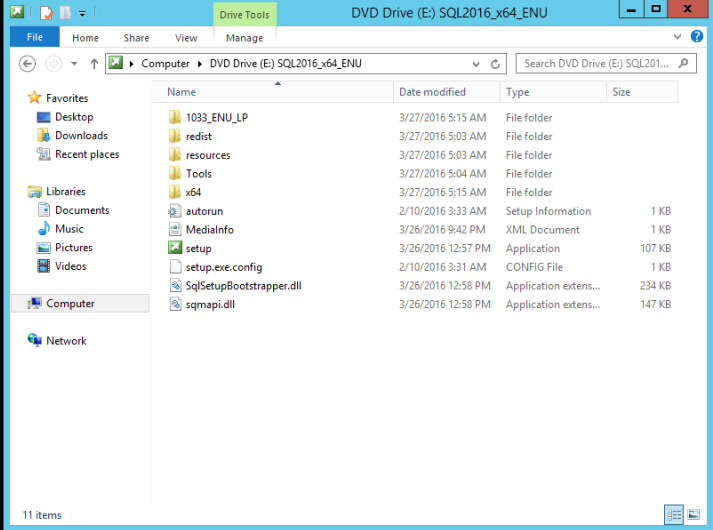
3 Launch the setup
To launch the setup, double click on the setup application file. After a few moments, the SQL Server Installation Center will open. It should look like this: 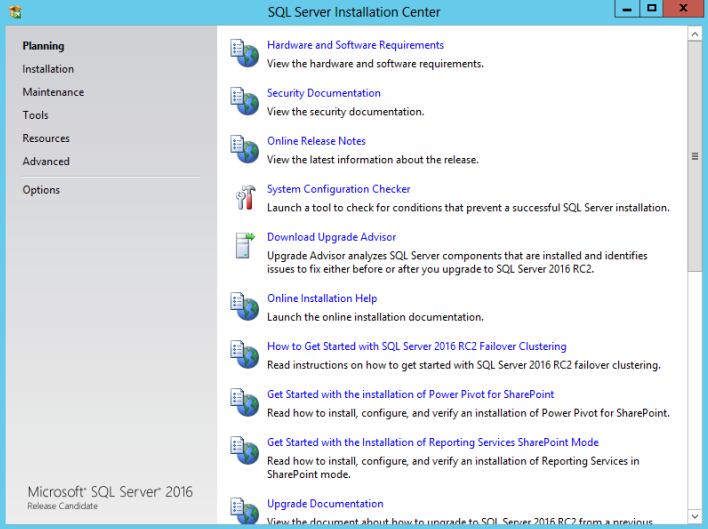 To start the installation, click on Installation on the left then click on the first option, “New SQL Server stand-alone installation or add feature to an existing installation”. Again, it may take a few moments for the new window to appear. When it does, it should look like this:
 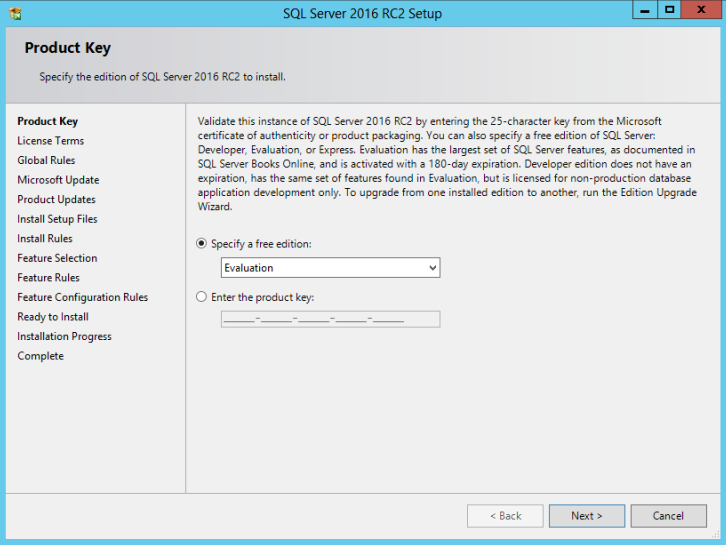 This window opens on the Product Key page. Since we are using the Evaluation version of SQL Server, we will just click next. If you are using a professional, full version, you would want to enter the product key here. After clicking next, you will go to the License Terms page. Read through the license terms then check the box for ‘I accept the license terms”. After clicking next, the setup will run a check. When it is complete, you will see the Microsoft Update page. Check the ‘Use Microsoft Update to check for updates (recommended)’ if you would like to install the latest image of SQL Server. I will choose this option, then click next. The setup will install the rules. It should only take a couple seconds to complete. When it does, it will look like this:
 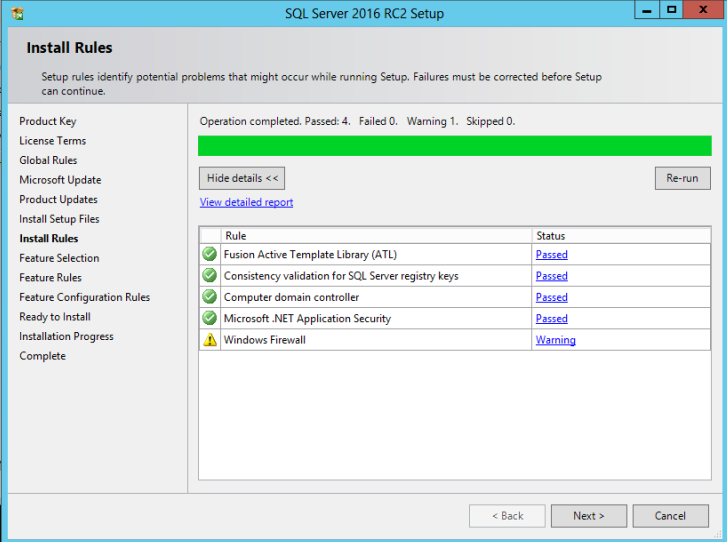 As you can see, I ran into a firewall rule warning. Since this is just a stand-alone install of SQL Server and the only purpose is for me to learn SQL Server, I will ignore this warning. If it were a real installation, I would resolve this issue so that it wouldn’t turn into further issues down the road. If everything passed for you, go ahead and click next to go to the Feature Selection page. The Feature Selection page allows you to select the features you want to install. If you click on a feature, you can get a brief description as well as any prerequisites and disk space required. We also have the ability to set the default directories that will be used for storing the SQL Server files. Below are the features I chose to install.
 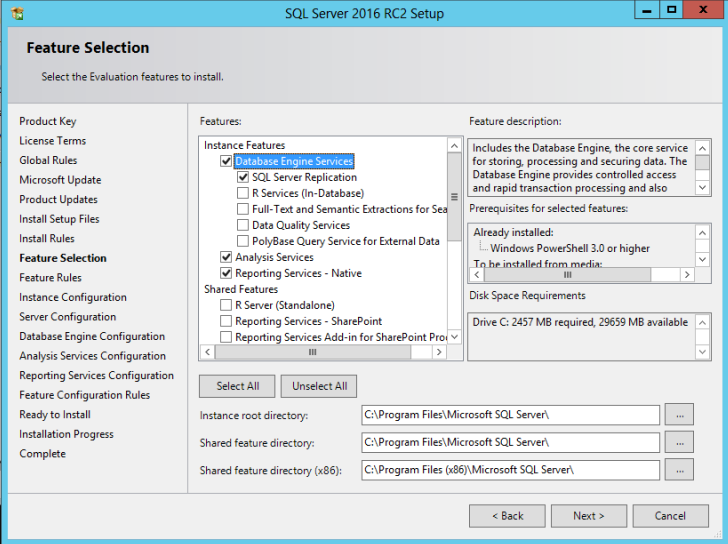 Once you choose your features and set all of your directories, click Next. The setup manager will run some checks to make sure you have all of the prerequisites. Next, we go to the Instance Configuration page. I am using the default instance, so I just click next. We are now taken to the Server Configuration page. Here, we can define accounts that will be used for each service. I chose to just keep the defaults:
 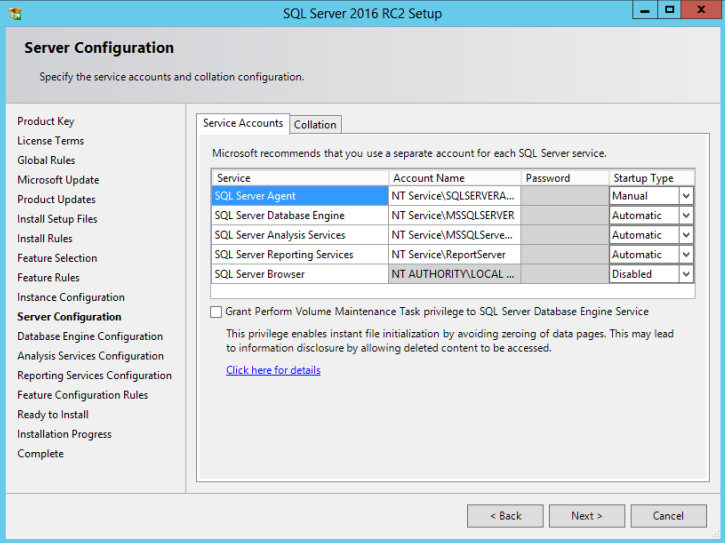 Click next to go to the Database Engine Configuration page. Here, I click the ‘Add Current User’ button to add the Windows account I’m currently using.
 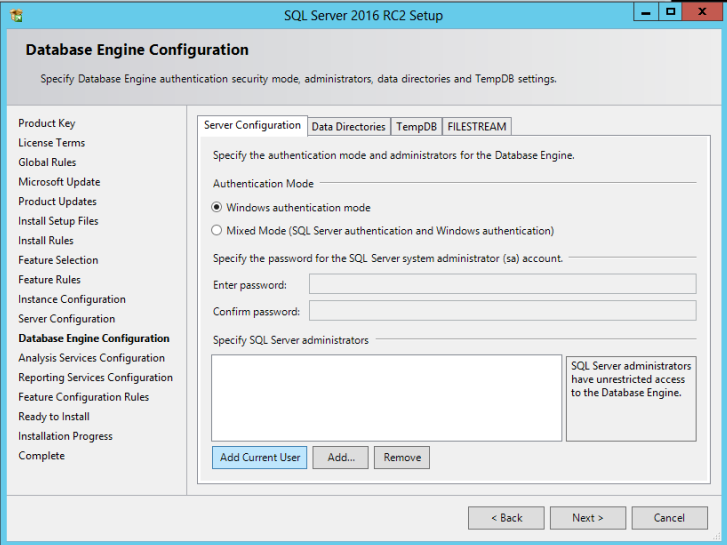 I left everything in all of the other tabs as their default values and clicked next to go to the Analysis Services Configuration page. Here, I clicked Add Current User again and then clicked Next.
 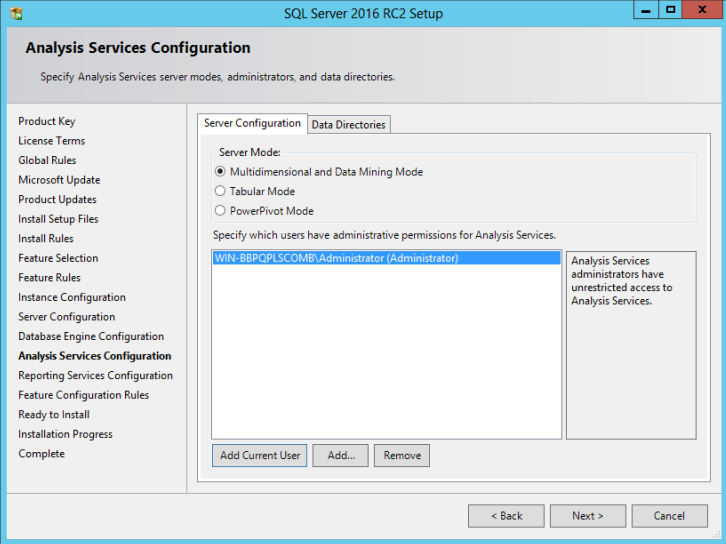 On the Reporting Services Configuration page I chose the default, Install and Configure, then clicked next. In the Ready to Install page, we can scroll through and review what we are going to install. If you want to change something, we can go back and do that now. Otherwise, click Install.
  The installation process may take several minutes. You can track your status with the Installation Progress page. Once the installation is complete, you will be brought to a page that shows you everything that succeeded and failed. I had three features fail. In order to get everything to work correctly, I had to go back and reinstall the features individually. Once you get everything installed for the SQL Server, we will install the management system. Click on Install SQL Server Management Tools.
 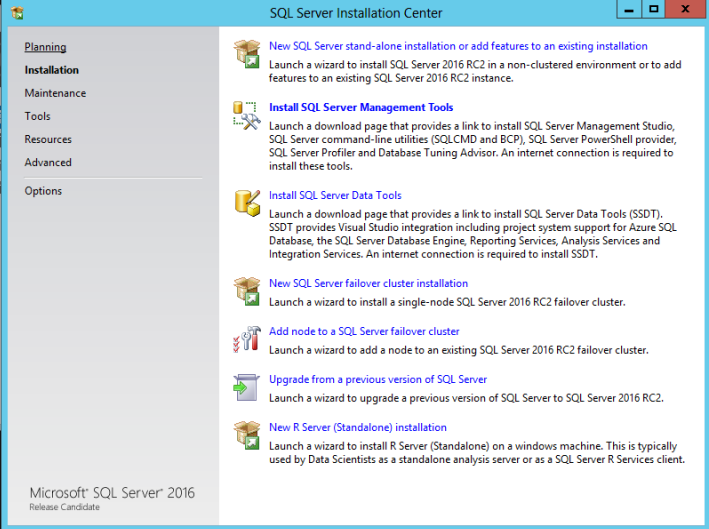 This will open a Microsoft webpage in Internet Explorer. Click the download link for SQL Server Management Studio and then click Run. This may take several minutes.
 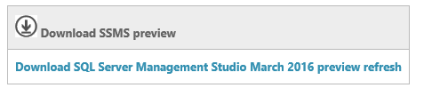 When prompted, click Install. Again, this process may take several minutes. Once it is finished, go ahead and restart the machine. To make sure everything installed properly, lets open the SQL Server Management Studio (SSMS). Go to the start menu and find the Management Studio:
 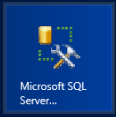 When it opens, click connect to connect to our SQL Server:
 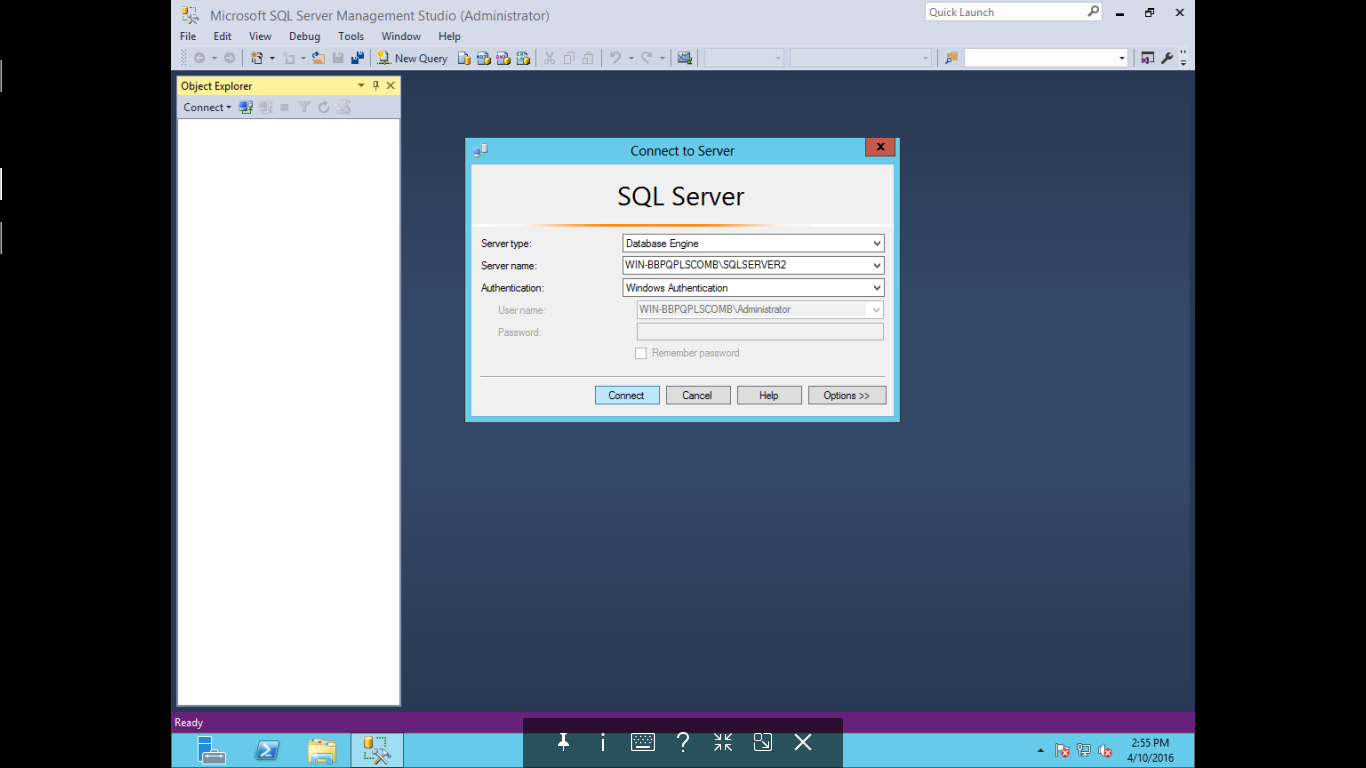 That’s it for installing SQL Server on a Windows Server machine. I should have new posts on using SQL Server soon! Have questions or suggestions? Please feel free to comment below or contact me.