An Introduction to ASP.NET
For this introduction, I will assume you have Visual Studio 2015 . The purpose of this tutorial isn’t necessarily to understand all of the inner workings of ASP.NET, C#, Visual Basic, etc. Rather, the goal is to get a feel for how all of this works together and to start seeing how the code looks.
What Is ASP.NET?
ASP.NET is a free server-side web framework developed by Microsoft. It is good for dynamic websites, applications, and services. Many languages are compatible with ASP.NET including Visual Basic, C#, J#, and Jscript. It works on top of the HTTP protocol and uses HTTP commands and polices for browser-to-server communication. It is part of the larger .NET Framwork (also by Microsoft). You can learn more at the official website, www.asp.net.
What is MVC?
MVC stands for Model-View-Controller. It is a method for making applications that are well architected, testable, and easy to maintain.
- Models are classes that represent the application’s data. They use validation logic to enforce rules for that data
- Views are template files that your application will use to dynamically generate HTML responses
- Controllers are classes that handle the incoming browser requests, interpret them, then send a response back to the browser.
Our first app, below, will use MVC.
Creating Your First Web App
Installing ASP.NET 5
Download and install ASP.NET 5 here. This will install the latest runtime and tooling. Once the executable downloads, click I agree and then Install. The process may take several minutes. After that installs, open the command prompt and run: [text] dvnm upgrade [/text] This will make the default .NET Execution Environment (DNX) the active path. Finally, we also need to download and install the Visual C++ Redistributable for Visual Studio 2015. Once the executable downloads, click the box to agree and then Install.
Create a New ASP.NET Project
Open Visual Studio 2015. Next choose File - New - Project. In the New Project window, Choose Installed - Templates - Visual C# - Web. Then, keep the default (ASP.NET Web Application). Near the bottom of the window, type a name for your project. Mine will be TechTrekASPNET. Click OK when you are done.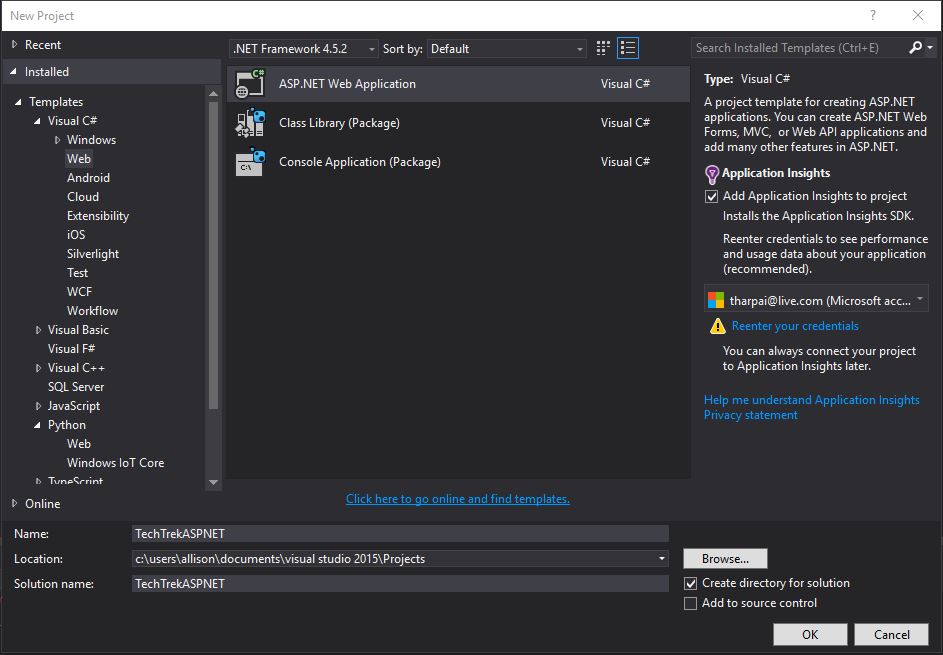 The New ASP.NET Project dialog box will appear. Select Web Application at the bottom under ASP.NET 5 Templates. My Microsoft account does not have a cloud subscription attached, so I unchecked the Host in the cloud option on the right. When you are done, click OK.
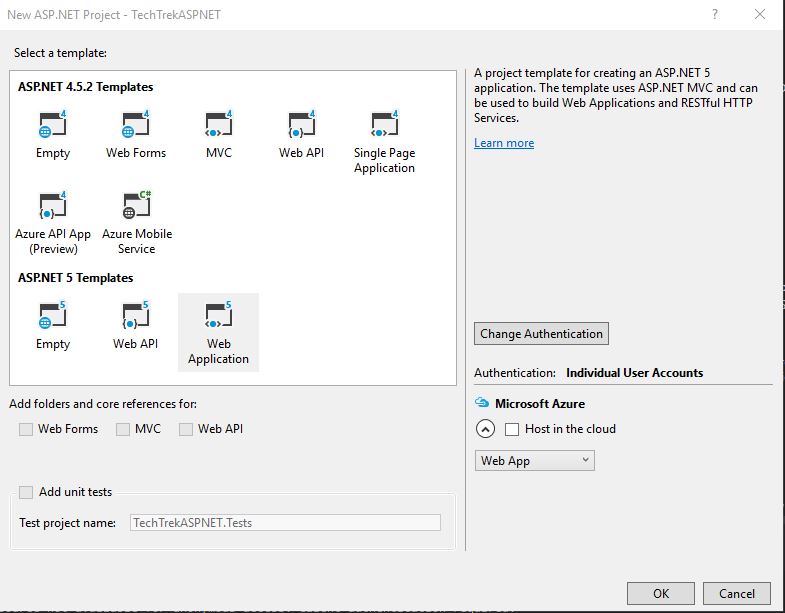
Test Your App
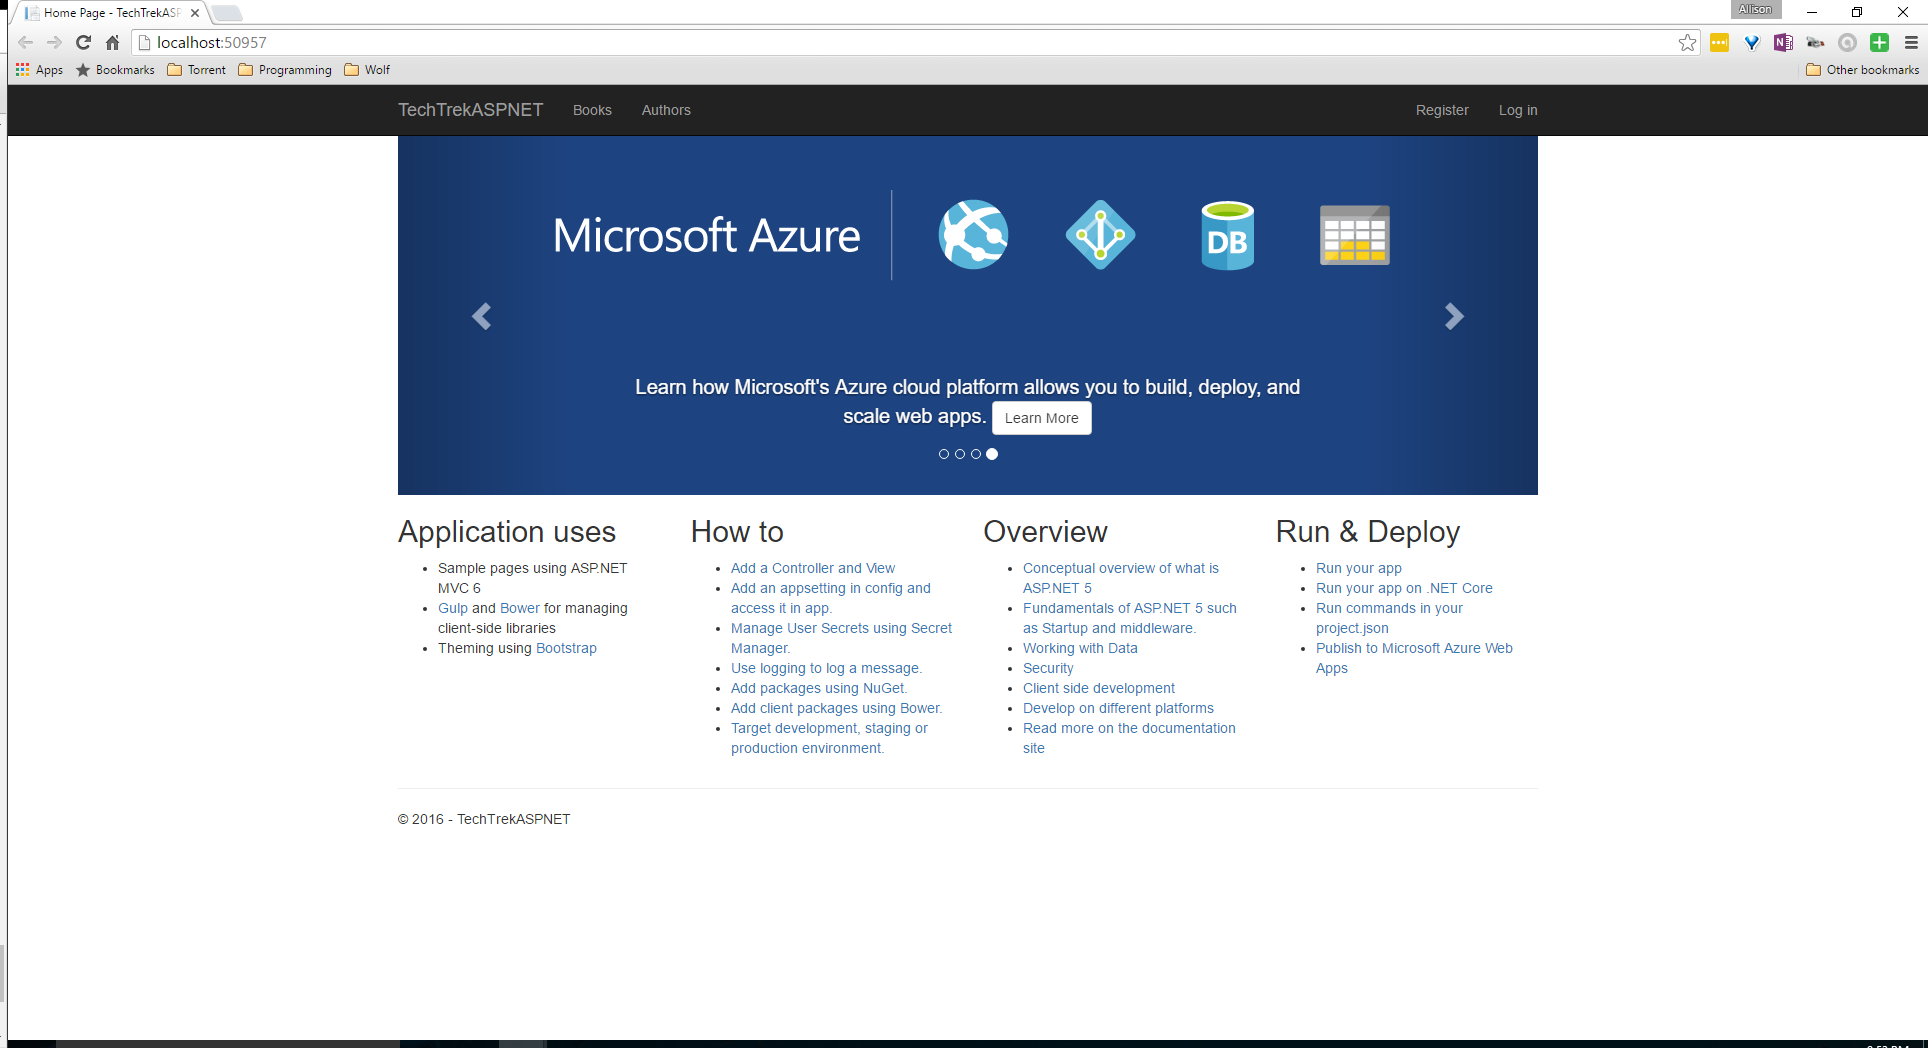
It will take Visual Studio a few moments to create your app. You will know it is done when the output window stops (the last line should say something like “Installed: 235 package(s)“. Once it is complete, test it out by going to Debug - Start Debugging (or, press F5). It might take a few moments for Visual Studio to initialize the app. When it is done, your app will open in your default browser and will look something like this: 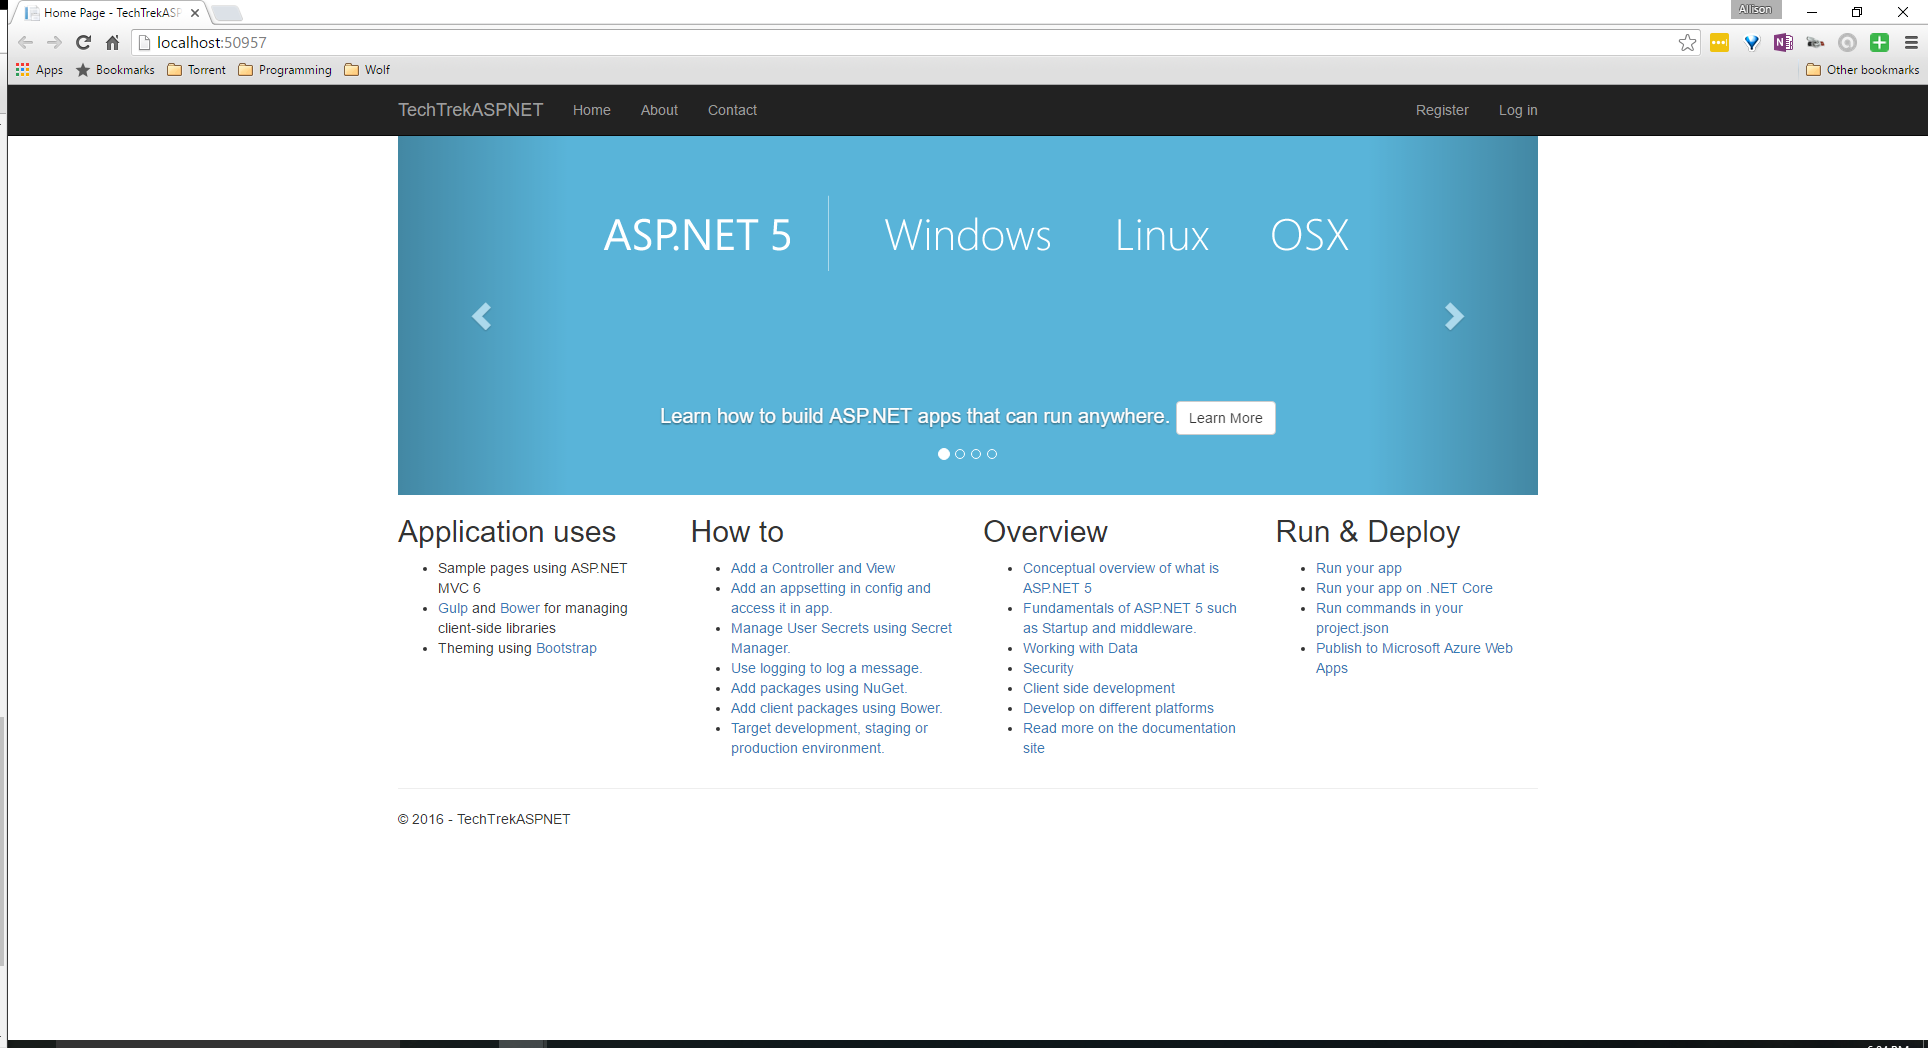 While this page is open, go ahead and adjust the window size of your browser and notice how dynamic the page is – this is the power of ASP.NET. When you are done looking at your awesome new web app, close the window and click Stop Debuggin**g **in Visual Studio (it is a red square in the top and near the middle).
Review the Project
Visual Studio did a lot of legwork for us, so we need to look at what it did so we can begin to understand. The Solution Explorer on the right side of Visual Studio is a tree that shows the folders and files for your project. Yours should look similar to mine: 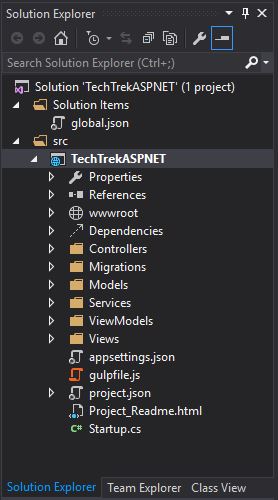 The main files we care about right now are:
- project.json
- This file contains the information that the .NET Execution Environment (DNX) needs to run
- global.json
- Visual Studio uses this to configure the project
- appsettings.json
- We can use this do add more project information (like connection string values)
- Startup.cs
- Startup is a class that helps with the startup of the application. It has to have a Configure method and might also have a _ConfigureServices_method
- Index.cshtml
- Located under Views - Home or Views - Manage, this file contains the HTML for the default page of the view
- _Layout.cshtml
- Located under Views - Shared, this file contains the HTML that is shared across multiple pages of the web app
- HomeController.cs
- Located under Controllers, this controller keeps the classes that handle incoming browser requests, retrieve model data, and then specify view templates that return a response to the browser
Create an entity class
An entity class is a class you create to define the schema of the data for your app. Think of it as table definitions of a database - each property will specify a column in the table of the database. We will create two: Book and Author. In the Solution Explorer, right click the _Models_folder and select Add - New Item. In the Add New Item window, make sure Class is selected and type ‘Author.cs’ in the Name textbox. When you are finished, click Add. We can put model classes anywhere in our project, but it is common convention to keep them in the _Models_folder. 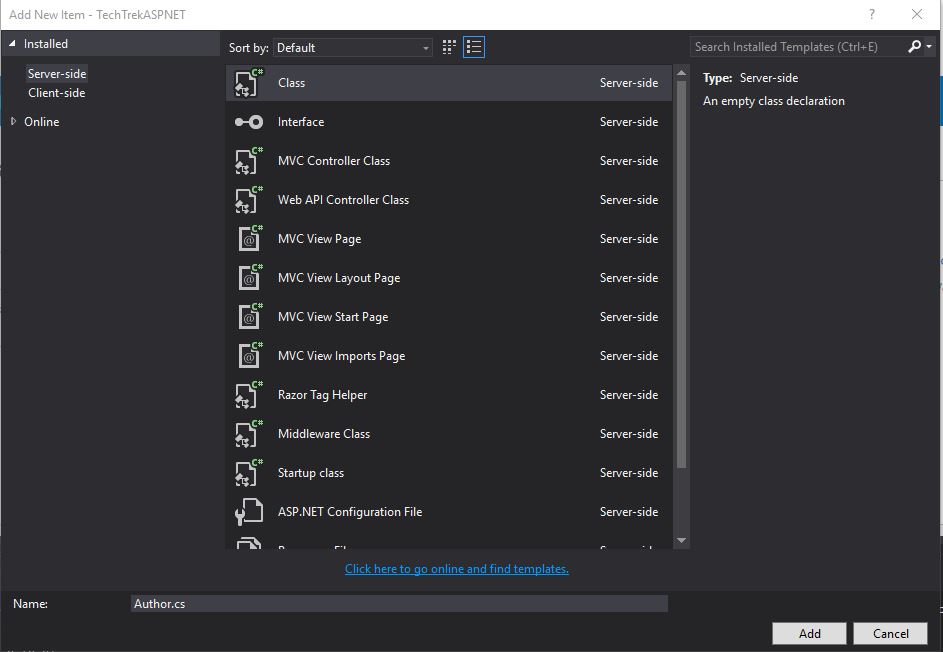 Replace the default code with: [csharp] using System.Collections.Generic; using System.ComponentModel.DataAnnotations; namespace TechTrekASPNET.Models { public class Author { [ScaffoldColumn(false)] public int AuthorID { get; set; } [Required] [Display(Name = “Last Name”)] public string LastName { get; set; } [Display(Name = “First Name”)] public string FirstMidName { get; set; } public virtual ICollection
What is Scaffolding?
Scaffolding automatically generates a starting point for your CRUD operations. CRUD stands for Create, Read, Update, and Delete. The neat thing about it is that we can create controllers to contain the CRUD information without writing any code. Right click on the Controllers folder within the Solution Explorer and choose Add - New Scaffolded Item… In the Add Scaffold window, select MVC 6 Controller with views, using Entity Framework, then click Add. In the Add Controller window, click the down arrow for the Model Class and choose Book. For the Data context class, choose ApplicationDbContext. If it isn’t checked, make sure Generate Views is selected. Click Add. 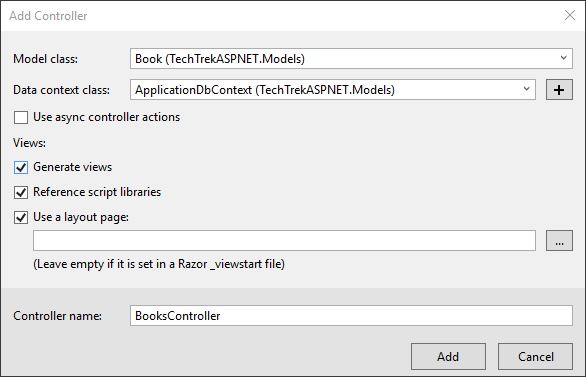 This creates a set of views which will provide the User Interface and the code to CRUD data from the database. Do the same for Author. When these are complete, you should see _AuthorsController.cs_and _BooksController.cs_under the Controllers folder in the Solution Explorer. We also just created Authors and Books folders within the Views folder.
Add Sample Data
Lets add some sample data. This isn’t how we would do it in production necessarily, but it will be good practice for us to see the code and see what it looks like in the app. Add a class called SampleData to the Models folder with this code: [csharp] using Microsoft.Data.Entity; using Microsoft.Extensions.DependencyInjection; using System; using System.Linq; namespace TechTrekASPNET.Models { public static class SampleData { public static void Initialize(IServiceProvider serviceProvider) { var context = serviceProvider.GetService
Test Your Application
Go to Build - Build Solution (or ctrl+shift+b). If everything worked, the output window will say: [text] 1>—— Build started: Project: TechTrekASPNET, Configuration: Debug Any CPU —— 1> 1> Build succeeded. 1> 0 Warning(s). 1> 0 Error(s). 1> 1> Time elapsed 00:00:00.6045819 1> ========== Build: 1 succeeded or up-to-date, 0 failed, 0 skipped ========== [/text] If you try to load your web application now (by debugging), you will receive a 500 Internal Server Error because it will be unable to locate your local Local Database Runtime installation.
Create Your Database
We want to do data migrations with EF (Entity Framework). EF is an objection-relation mapping (ORM) framework. It will let us work with relational data as objects, which will allow us to not need to write as much data-access code. By doing our data migrations this way, we will be able to update all of our models throughout the application with a few simple steps – this way we can build and maintain the app more efficiently. If we didn’t do it this way, we would have to recreate our entire database every time we wanted to change the model or schema. Open the command prompt in your project directory. For me, this is C:\Users\Allison\Documents\visual studio 2015\Projects\TechTrekASPNET\src\TechTrekASPNET. If you are unsure where your directory is, right click your solution name within the Solution Explorer and click Open Folder in File Explorer. To open the command prompt in this location, hold shift while right clicking in the blank area of the file explorer. Choose Open command window here. Run the following commands: [text] dnu restore dnx ef migrations add Initial dnx ef database update [/text] Each of these commands will output several lines and may take a few minutes to complete. After the second command, I received a warning: An operation was scaffolded that may result in the loss of data. Please review the migration for accuracy. I assumed this was okay and went on the next command. This command issued an error: A network-related or instance-specific error occurred while establishing a connection to SQL Server. The server was not found or was not accessible. Verify that the instance name is correct and that SQL Server is configured to allow remote connections. (provider: SQL Network Interfaces, error: 52 - Unable to locate a Local Database Runtime installation. Verify that SQL Server Express is properly installed and that the Local Database Runtime feature is enabled.) This is because the default connection string for me was incorrect. I found the correct connection string by opening Microsoft SQL Server Management Studio (SSMS) and checking the database name in the Object Browser. For me, this looked like this: 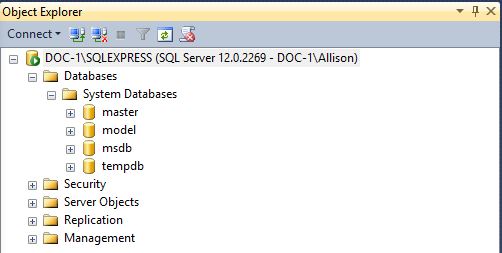 To change my connection string, I opened the appsettings.json file and changed the connection string to: [text] “ConnectionString”: “Server=DOC-1\\SQLEXPRESS;Database=aspnet5-TechTrekASPNET-06462d68-f9b6-4fad-86b3-c9df2147053c;Trusted_Connection=True;MultipleActiveResultSets=true” [/text] The trick here is that there needs to be two backslashes before SQLEXPRESS.
Add Navigation
Open the _Layout.cshtml file located in Views/Shared. Find the following: [html]
Test Your Application
To test our application, first we must build it. Select Build Solution from the Build menu. Next, we need to run it. In the Solution Explorer, right click your project and select View - View in Browser. The application should look like this:
Notice the links at the top now say Books and Authors. Click on the Books link. It should look like this: 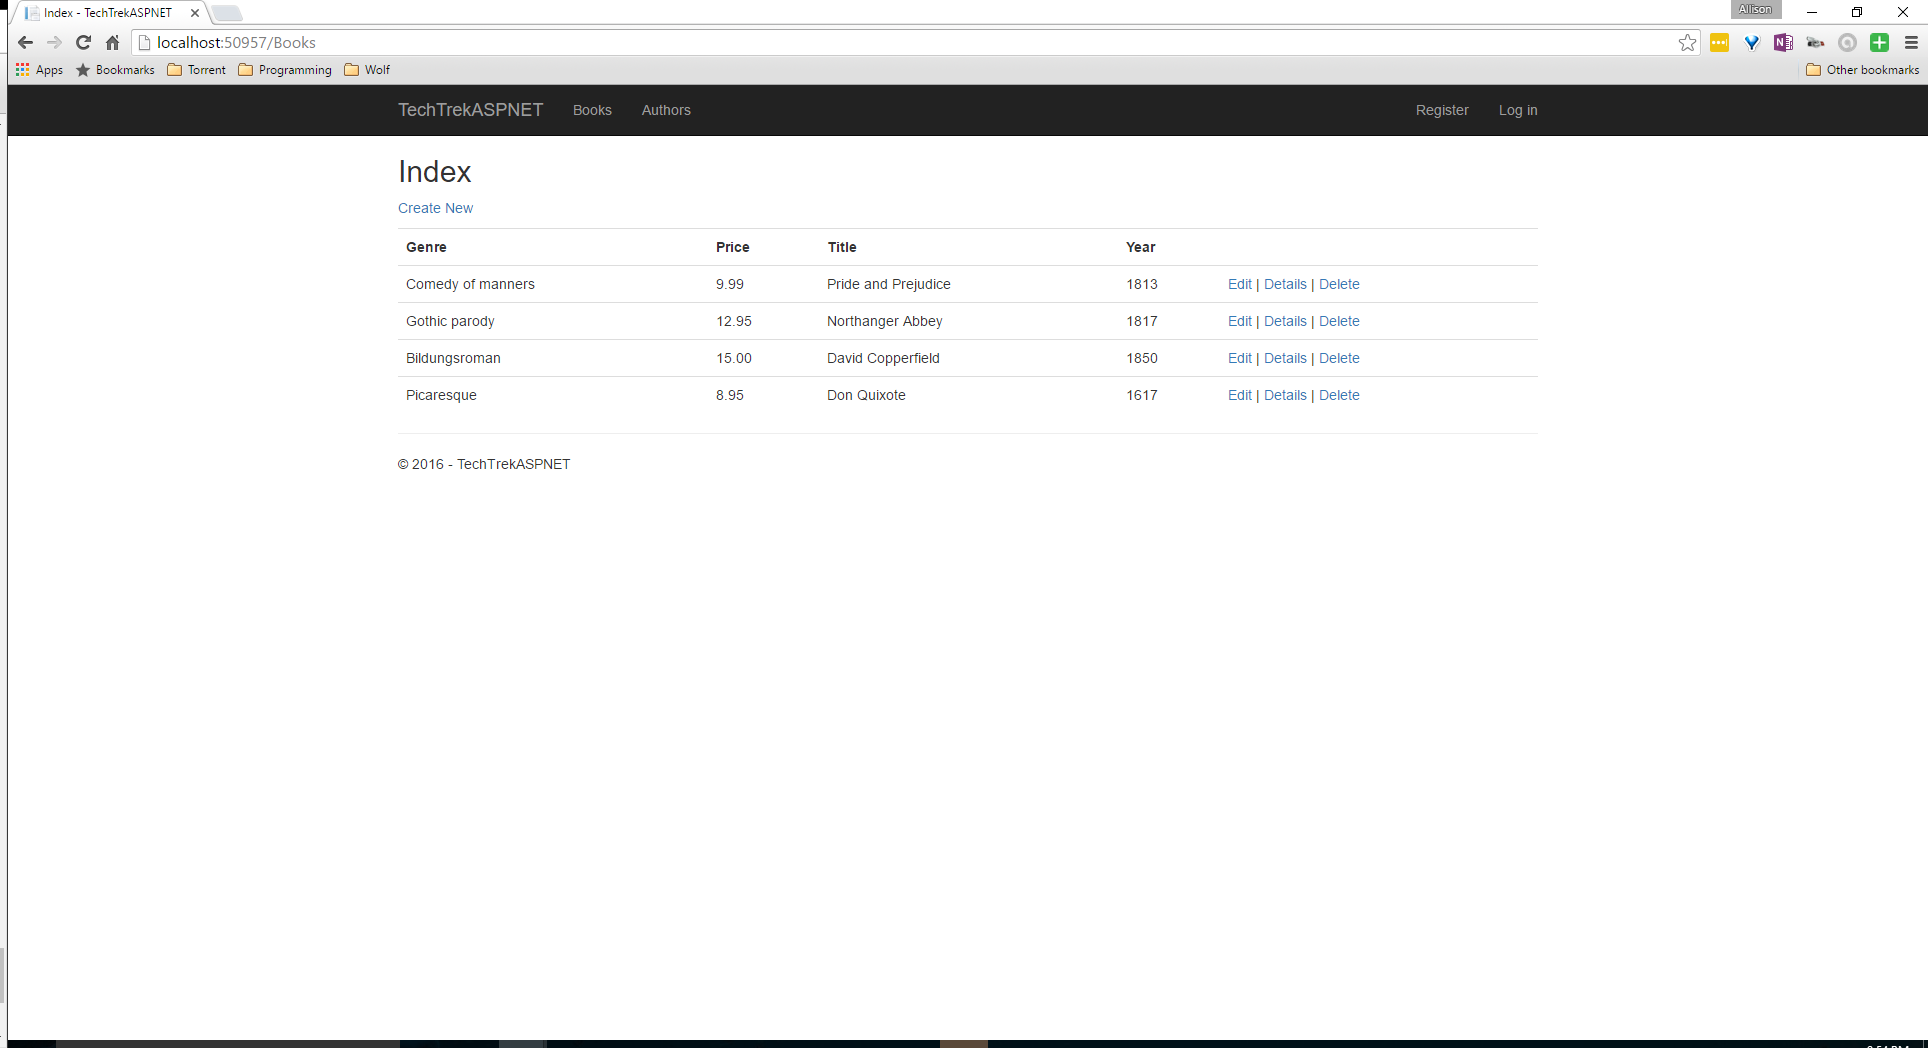 That’s it! This walk-though was pretty generalized but I think I have enough understanding now to create my own web app. I have several ideas that I think could work well as web apps, so as I find time I think I will start working on those. Have questions or suggestions? Please feel free to comment below or contact me.