Moving Your MySQL Database to Another Location
I have MySQL databases on my laptop, my desktop, and two chunkhost servers. I haven’t been using my laptop very much lately so I want to move the databases that are stored locally on that machine to one of my chunkhost servers. This way, I can access them easily from any machine. In order to do this, you will need an SCP client (I use WinSCP).
Step 1: Backup Your Database
The first step is to backup your database. In order to do this, we will use the mysqldump command in the command line. In order to get to the command line, press the windows key and type ‘cmd’. Once you have the command prompt open, type: [text]mysqldump -u root -p halloween > halloweendump.sql[/text] In the example above, root is my MySQL username, halloween is the database I want to backup, and halloweendump.sql is the filename that the backup will be saved to. This file will be stored wherever you are doing the command from. Unless you have changed directory, this file will be stored under C:\Users\[your username].
Step 2: Move Your Backup to New Location
WinSCP is used to securely copy (SCP) files from one location to another. It is a nice interface because it allows you to drag and drop the files easily. In general, the left side of the WinSCP window will be one location (for me, this is my local computer) and the right side will be the new location (for me, this is my chunkhost). On the left side, I navigated to the directory where my .sql file was located (for me, this is C:\Users\Allison\Dropbox\mysqldb\halloween, but the default would have been simply C:\Users\Allison). On the right, I navigated to the directory on my chunkhost that I wanted to move the file. Then, I simply clicked the .sql file on the left and dragged it to the right. 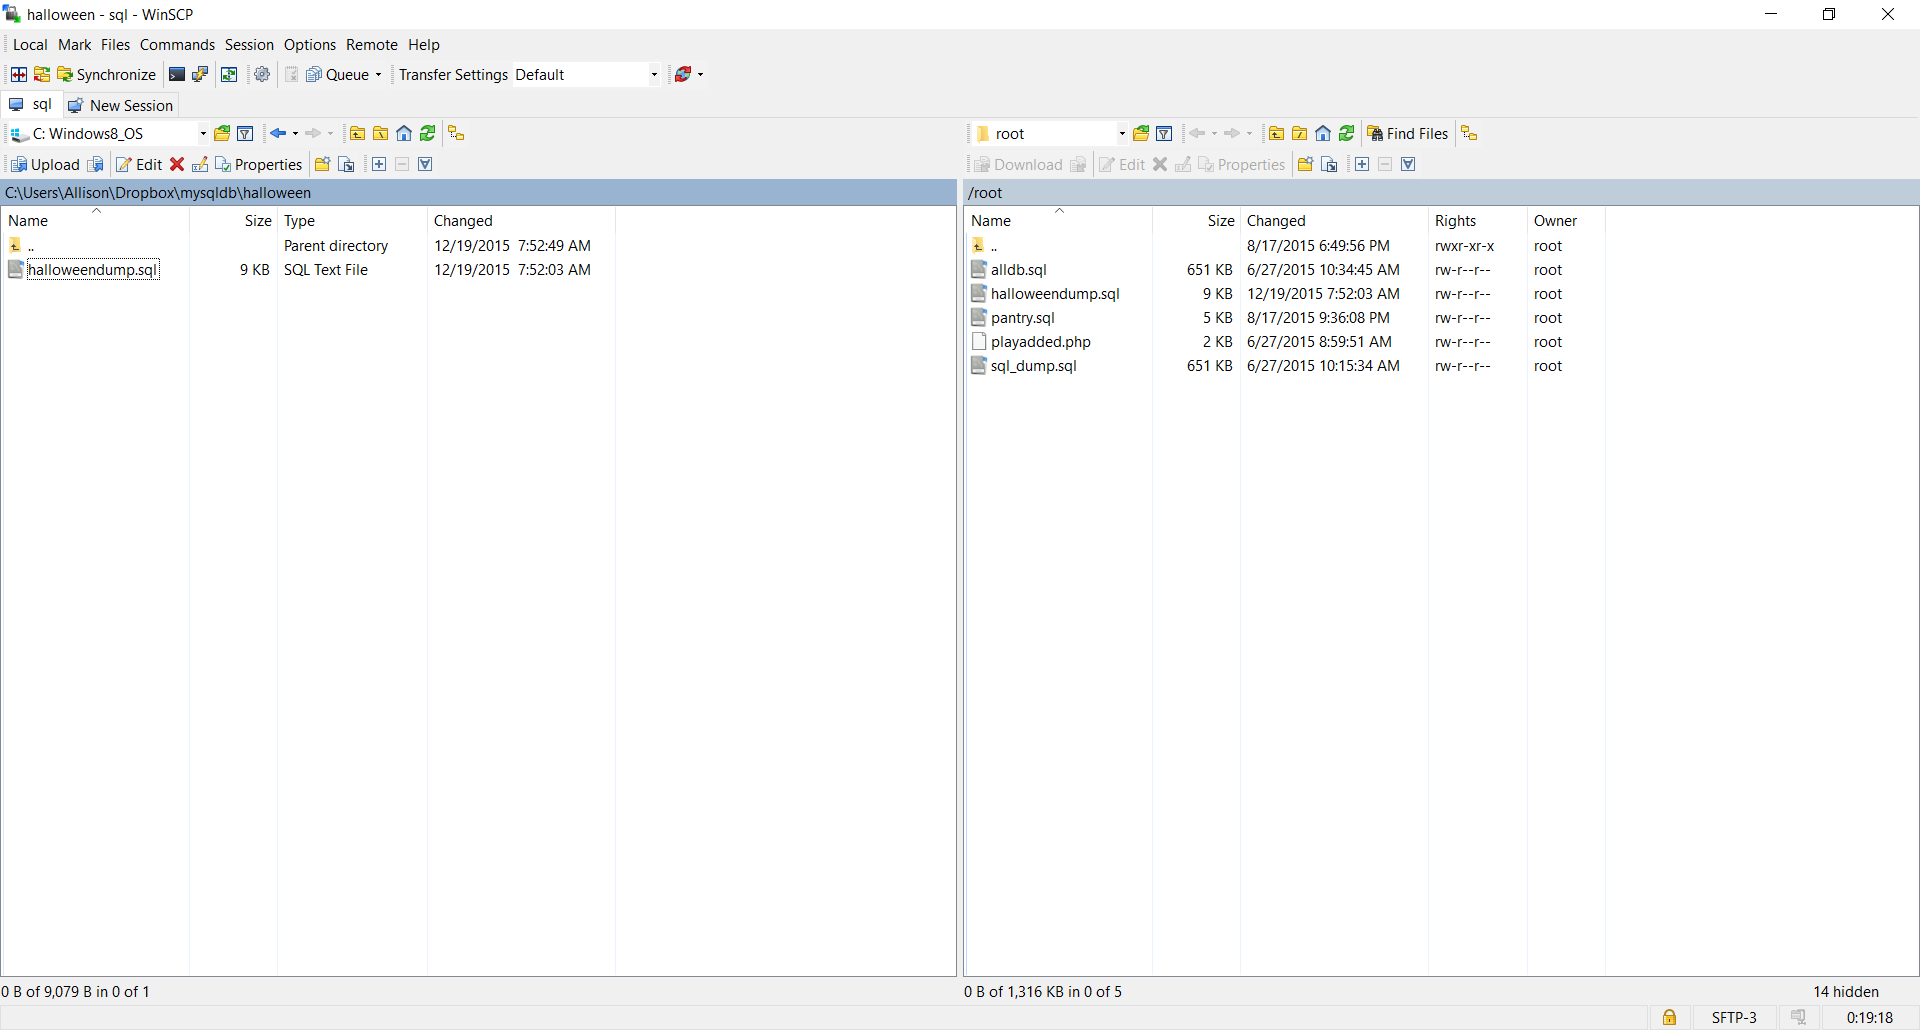
Step 3: Create an Empty Database on New Machine
We will need to create a new database of the same name on the new machine before we restore the database. In order to do this, simply connect to mysql using the command [text]mysql -u [username] -p[/text] Once you are connected, create the new database with [sql]CREATE DATABASE [databasename];[/sql]
Step 4: Restore Database on New Machine
Next, we will import all of the information from the database by doing a restore command. Quit MySQL and get back to the command line of the machine you want the new database to be on by using the command: [sql]QUIT;[/sql] Next, we will import the database: [text]mysql -u root -p halloween < halloweendump.sql[/text] In this example, root is my MySQL username, halloween is the database I’m restoring, and halloweendump.sql is the file that I am restoring the data from. After you do this, you should be connected to MySQL. Check to make sure the tables and data were entered correctly. First, we want to make sure the database is there: [SQL]SHOW databases;[/SQL] Then, we will check to make sure each of the tables were imported: [SQL]USE [databasename] SHOW tables;[/SQL] Finally, we will check to make sure the data was imported: [SQL] SELECT * FROM [tablename];[/SQL] That’s it! If you did everything correctly, the database and all of its data should now be in the new location.