Building Your First Database With MySQL
I guess it would have been appropriate for this to be the first post but better late than never, right? What Is A Database? A database is simply a collection of data. MySQL and other relational databases consist of many tables that are all related to each other in some way. Think of a table as a spreadsheet: it has rows and columns and where they meet is considered a cell. There can be many types of things in a cell such as text, integers, floating numbers, time, date, etc. Database tables are the same! What makes a database unique to a spreadsheet however is that there are many tables inside one database. If you want to look at columns of two different tables, such as what we did in the normalization blog post with the LEFT JOIN, you can do that very easily. The data should be organized in a logical manner and it should be easy and fast to get to. Databases are hugely important to businesses big and small. They are used to track the business’s finances and employees. Your doctor’s office surely has a database where they track their patients and large retailers have databases to track their inventory. However, databases can be useful to people at home as well. I plan on creating a database to keep track of what grocery items we have in the house and what items we are out of when we go to the store. If you are a big reader, you could keep a database of all of the books you have read with their author, genre, and how you would rate it. Installing MySQL When you first start your database, you have to decide if you want it to be located on your local machine or on a server somewhere else. The benefit of having it on your local machine is that you don’t have to worry about your computer or the server to be connected to a network. It is also slightly easier to set up, so that’s what we will do. To install MySQL on your local machine, head over to the MySQL website and download the Community Server. The MySQL installer is a great tool if you are using your local machine. It is a program that allows you to find, update, and remove MySQL products from your machine. I don’t think it is necessary but it definitely makes the installation process easy. MySQL Workbench You can install the MySQL workbench through the MySQL installer. However, I really believe you should try to build your first database(s) by hand. It will help you understand what the Workbench is doing in the background, which will help you when you inevitably need to troubleshoot. Connecting to MySQL The first step is to add mysql to your system’s environment variables. First, we must find where MySQL is installed. The default directory should be C:\Program Files\MySQL\MySQL Server 5.7. Once you find where yours is installed, navigate to the bin folder and copy the address (C:\Program Files\MySQL\MySQL Server 5.7\bin). Next, on Windows 10, type ‘variable’ into the search bar on the bottom left and click on ‘Edit the system environment variables’: 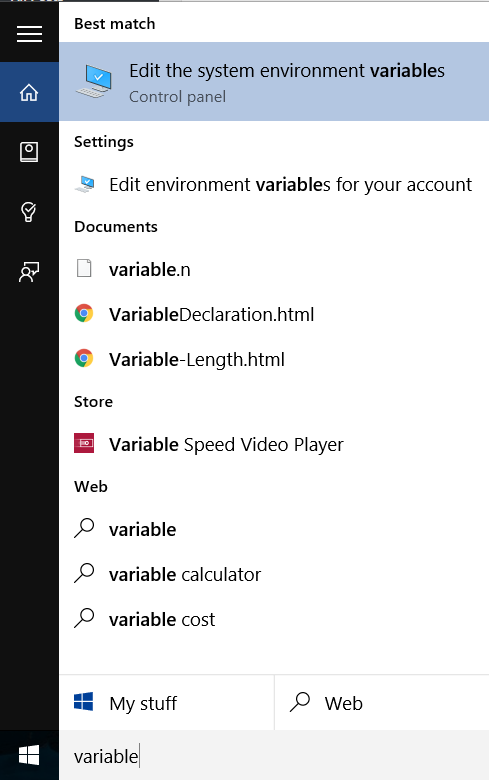 Click on Environment Variables on the bottom right of the window that pops up.
  Be careful when editing your Environment Variables. Always make sure you do not delete anything! There are two types of Environment Variables: User variables and System variables. We want to edit our System variable. In the bottom portion, look for the variable ‘Path’. Click on it and then click ‘Edit…’. Navigate to the end of the variable value or press the ‘end’ key on your keyboard. Place a semicolon (;) and then paste the address location (C:\Program Files\MySQL\MySQL Server 5.7\bin). Press okay and apply the changes. This allows you to now use the command ‘mysql’ in the command prompt (type ‘cmd’ into the search bar). If you type mysql into the command prompt now, you should receive an error that reads Access denied for user (using password: NO). The command ‘mysql’ is looking to log you into your MySQL account but we don’t have one yet. To set your root account, type
 mysqladmin -u root password: ******* Making different users with different permissions is a good idea but the root account will be fine for us for now. To log into the MySQL database, type mysql -u root -p When prompted, enter your password and press the enter key. The command prompt should now say mysql>. MySQL Basics In general, MySQL commands are written in caps while things like table names, columns, variables, etc are lowercase. MySQL is not case sensitive, but it is a good idea to follow this standard. All MySQL commands must end with a semicolon but can span multiple lines. I think we are finally ready to set up our database! I mentioned that I wanted to make a database to keep track of items in my pantry, so lets use that example. To start a new database, type CREATE DATABASE pantry; Great! You should receive a response that says “Query OK, 1 row affected”. To see which databases you have on your server, type SHOW databases; You should see pantry listed (there may be a few others by default as well). If you want to delete a database, use DROP DATABASE [database name]; Alternatively, you can use DROP DATABASE IF EXISTS [database name]; To use our new database, we must tell MySQL that we want to use it. Type USE pantry; A database is no good without tables. For my pantry database, I want to create a table that keeps track of different categories of food items. The command for this is:
CREATE TABLE cat (cat_id INT NOT NULL PRIMARY KEY AUTO_INCREMENT,
cat_name VARCHAR(20));
If you read my post on normalization, you know that every table should have a primary key. I try to always put the primary key as the first column in the table and I try to name the primary key as tablename_id. This is just a personal preference but I’ve found it has been nice to keep this habit. I never have to guess what the name for my primary key is as long as I know the table name (which I typically do). The general formula for creating a table is the SQL command CREATE TABLE [table name] ([column1 name] [column1 properties], [column2 name] [column2 properities]);. After the column name, you must tell MySQL what type of data you expect to be entered for that column. There are numeric types (such as INT, TINYINT, BIGINT, FLOAT, DOUBLE, etc), string types (CHAR, VARCHAR, BLOB, etc), and date & time types (date, time, datetime, timestamp, etc). This topic deserves its own post, but for now understand that VARCHAR requires you to estimate how long the string will be. It is okay if you enter a value into this column larger than what you estimated, it doesn’t prevent you from doing so. If you want the column to be required, after the column name and data type you must put NOT NULL. To set the column as the primary key you put PRIMARY KEY next and if you want the value to auto increment with each entry, you put AUTO_INCREMENT. Pretty easy! To see the tables in our database, you can use the command SHOW tables; To see details about a specific table, type DESCRIBE [table_name]; The last thing our database needs is some actual data! To enter values into a table, the general formula is INSERT INTO [tablename] ([col1], [col2], [colx]) VALUES ("[value1, value2, valuex]"); The first column in our cat table is the primary key which is not null, meaning we have to put something into it. MySQL still expects you to type something into that value spot, so we must type ‘NULL’. The final command to insert a row into our cat table is: INSERT INTO cat (cat_id, cat_name) VALUES (NULL, 'spices'); If you are putting values into all of the rows, you can remove the ([col1], [col2], [colx]) portion and simply type INSERT INTO cat VALUES (NULL, 'spices'); Be careful when using this method. You must put the VALUES in the same order that the columns are in. When I do this, I like to use the DESCRIBE command immediately before inserting the values. This way, I know what order to put everything in and I won’t make a mistake. To see all of the rows we have entered, we use SELECT * FROM cat; The asterisks in MySQL is a wildcard character. In this instance, we are asking MySQL to select everything from the cat table. If we just wanted to select a specific column, you can use SELECT [column_name] FROM [table]; That’s it! To create more tables, insert values, or create another database you just do this all over again. There are tools such as MySQL Workbench which make creating databases and tables even easier, but I believe everyone should start out doing them through the command prompt like this.